Town tram layout: Difference between revisions
From The Brighton Toy and Model Index
Jump to navigationJump to search
(+hyphen) |
(infobox update) |
||
| Line 1: | Line 1: | ||
{{ | {{Exhibit|Loc=40}} | ||
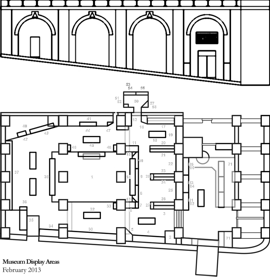
'''The town tram layout''' is at the back of [[the Museum]], housed in the left side of the [[00-gauge layout]] display. | '''The town tram layout''' is at the back of [[the Museum]], housed in the left side of the [[00-gauge layout]] display. | ||
| Line 6: | Line 6: | ||
The layout isn't run due to the difficulty of operating it behind glass in a comparatively inaccessable area (the model trams are quite tall and are prone to tipping over). | The layout isn't run due to the difficulty of operating it behind glass in a comparatively inaccessable area (the model trams are quite tall and are prone to tipping over). | ||
[[Category: Model railways]] | [[Category: Model railways]] | ||
[[Category: Model railway layouts]] | [[Category: Model railway layouts]] | ||
[[Category: Trams]] | [[Category: Trams]] | ||
Revision as of 18:41, 17 July 2011
| Exhibit |
|---|
Town tram layout |
 |
| location: |
The town tram layout is at the back of the Museum, housed in the left side of the 00-gauge layout display.
It contains a number of electrically powered trams, a tram station, and a town scene.
The layout isn't run due to the difficulty of operating it behind glass in a comparatively inaccessable area (the model trams are quite tall and are prone to tipping over).


