Category:Lego 4.5v - 12V Train System
Bricks: Original
|| Transitional
|| Modern || Duplo || Technic
Town Plan || Architecture || Legoland || City || Modular
Homemaker || Modular
Cars
|| Roofs
|| Windows and Doors
|| Wheels
4.5V Trains || 9V Trains
Maxifigures
|| Legoland figures
|| Minifigures
|| Microfigures
1966: The patented railway track concept [image info]
1966: Lego Flexible Coupler. The cheaper version of a railway coupling: basically a thin moulded flexible transparent piece of tough bendy plastic with a four-stud square at each end. [image info]
1968: Electronic Control [image info]
1968: 119 Super Train Set [image info]
1971: Trackwork: "Build a real railway" [image info]
Lego have produced a range of train systems over the years, adopting 4.5V remote-cabled, 4.5V standalone, 12V standalone, and 9V track-powered solutions. They even produced a monorail system.
In line with Lego's policy of keeping the Lego universe self-contained, the company designed their own non-standard track system(s) and gauge rather than adopt any existing standards.
1962: Pre-wheels!
The first suggested Lego train designs shown in the Lego Idea Books didn't actually have wheels, but sat on red blocks (Lego Ideas Book 2, 1962, left). These were updated to include the by red standard wheels (sans tyres) pretty quickly (Lego Ideas Book 1 (revised), circa 1962).
But still no dedicated railway wheels ...
1965: A floor train
Set 323 was a fairly crude long steam locomotive and carriage, executed in red with a blue side-stripe, with standard wheels and grey tyres. Track wasn't an option.
As far as we know, this was the first set that was specifically designed to let one build a Lego train.
1966: Blue Track, 4.5V
Initially a pushalong train, which later gained a 4.5V electric motor and a handheld battery pack with a dangly cable.
The train's wheels were no longer the standard small Lego wheel with two flanges to hold the tyre, and only had in inner tapered flange, so that they could now work with track points. However, the new wheeel still had the usual four studs, just like "normal" small wheels.
The 4.5V battery pack took three 1.5V batteries, two lengthways and one sideways-on.
Track construction
Track construction was very simple: rails were blue plastic, either "straights" or outside or inside curves, and clipped directly onto completely standard 2×8-stud strips, which acted as the railway "sleepers".
The system is usually described as using blue rails and white sleepers (which was what was supplied) ... but since the sleeper parts were totally standard 2×8-stud strips, they could be replaced by strips of any other colour whatsoever ... or by any other two-stud mounting system that the user could devise. This early flexibility was lost in the "grey" track systems, which used a non-standard rail-mounting method.
Remote-by-wire, to tender power
Initial marketing pictures showed the battery box and controller being hand-held, which allowed Lego to promote the train as being "remote controlled" (by wire). However chasing a train around the track with a box and dangly cables presented obvious problems when there was trackside signalling or buildings ... or if the train ran under a footbridge!
Later promotional pictures have the ~six-stud-wide battery box with wheels and running behind the loco, as a tender.
1969: Train Wheels
More realistic-looking train wheels, with the original four studs replaced by moulded radial spokes, appeared in 1969 with set 903 "Train Wheels and Couplers", which allowed Lego owners to build properly-wheeled trains from their existing parts without having to buy a dedicated Lego train set. The couplers in this pack were mechanical.
1969: Blue Track, 12V, four-rail
In 1969, Lego introduced a more "normal" mode of running the trains, from a remote controller supplying power via rails. As with most dedicated model railway systems, the new system used the higher voltage of 12 Volts. The 4.5V system had been chosen because three AA batteries could be fitted in a reasonably compact battery box, but switching to a mains-powered DC transformer allowed pretty much any voltage the designers wanted. It also let Lego do away with the heavy and bulky battery box, and made the system cheaper to run (no replacement batteries needed).
12V had already been found by the model railway community to give the optimum voltage range, the problem with very low voltages being that when lots of powered rail segments were fitted together, surface oxidation gave a voltage drop across each contact ... although individually tiny, the effect was cumulative so if one only had a small voltage to start with, the effect of dirty track contacts would be more pronounced.
The use of the 12V standard also meant that users could use a conventional model railway controller if they wanted to.
Centre power rails
The battery-powered system had used simple plastic non-conductive track. Rather than ditch the existing system, Lego chose to retain it the existing track and wheels for the trains' mechanical aspects, but add a further optional centre-power strip that would supply 12V DC directly to the motor unit though two studs fitted to its base, side-by side. The power strip was basically a long blue two-studs-wide plastic brick (straight or curved) with two rounded square cross-section lengths of plated metal tube embedded in its upper surface, that clipped to two of the central studs on the 2×8 "sleeper" plate, with the folded metal ends pushing together to make electrical contact.
Users who had already invested in the existing unpowered track system could upgrade it to 12V DC just by buying the centre two-rail power strips and clipping them to the middle two pairs of studs of the 2×8-stud sleepers. Users wanting to retrofit power rails could buy packs 750 (straight power rails blue ×8), and 750 (curved power rails blue ×8).
It would be tempting to refer to this as the 12V era, if it wasn't for the fact that Lego continued to sell the 4.5 Volt battery-powered system in parallel. The 4.5V electric motors and battery packs were still useful for all the people who wanted to build something other than a train, or who only wanted to run a train occasionally, or who wanted to have a go at building a train on rails but didn't want to invest in a full-blown electrically powered system.
And of course, the unpowered rails and wheels would still be useful for building things like gantry cranes.
1980: "Grey Era", 4.5V and 12V
In 1980, Lego changed the system by redesigning the track and changing the colour from blue rails to light grey rails on custom darker sludge-grey sleepers.
Although superficially almost identical once assembled (other than the color), the track and the sleepers, and how they connected, were now different.
A criticism of the original system, where the track connected to standard plates using standard Lego studs,was that if laid on thick carpet, the continual flexing of the joints as the train ran over them could work the track free and/or eventually loosen the fit.
The new custom plates replaced the four Lego studs where the track connected with a pair of parallel narrow rectangles that fitted into a rectangular hole in the base of the rail. An almost imperceptible widening at the very top of the rectangular protrusion then mated with a tiny rectangular hole in the sides of the rail base, giving a more positive "retention" fit rather than a "push-fit" relying only on friction.
Although this gave a more positive "snap-fit", the tall thin rectangular protrusions were correspondingly more prone to being snapped off if on pulled the rauls off the plates at a bad angle. This was probably one of the very few parts made by Lego that were prone to breaking. Lego also took the opportunity to add a countersunk central hole to the plates (for users who wanted to permanently screw their track to layout baseboards), and specified that ther should be plates rnning acoss the middle of each pair of railes, as well as at the ends.
The optional power rails still connected in the same way, to normal Lego studs. The updated power parts could be bought in packs 7854 (straight power rails grey ×8), and 7855 (curved power rails grey ×8). We're not sure if there were any other differences between these and the older power rails.
1990/91-2006: Metal track, and 9V
1990 saw Lego embrace two-tone grey track (to look more realistic, and visually merge in better with the Lego City sets), and a switch to 9 Volt DC electrical power (to mesh with the new Lego Technic 9V system)
Rectangular 9-Volt PP3 batteries had been introduced in 1956 by Ever Ready as a new option for mobile battery-powered transistor electronics, like transistor radios, and they were becoming a default option for compact power that needed more than the 6V that you could get from four "AA"'s. With the new preponderance of 9V electronic devices, 9V also became a common voltage for external power supplies, and Lego Technic standardised on 9V for its motors and electronics. With Technic using 9V, it was natural for the next generation of Lego trains to use 9V too, rather than have two Lego ranges use two different sorts of power supply.
Since stud-mountings and the later rectangular mountings for thin rails had both had their own problems, Lego now decided that the fiddly business of clipping rails to plates should be done away with altogether, and the new track sections, although again visually much the same as the previous versions, were now made out of a single piece of moulded plastic, within nothing to come apart, and with sleepers packed twice as densely as before for maximum stability.
The new track was reassuringly rigid, and looked and felt more expensive than its predecessors, an impression helped by the metal cladding wrapped around the upper surfaces of the rectangular track.
The track kept the bevelled screw-hole in the central plate, and added a couple of panel-pin holes for securing the track. Track rail sections gave a good overlapping fit, and the ends of the tracks had a "half-panel" with a single row of holes that clipped to its neighbour via a jigsaw-puzzle-style protruding "outie" tab and "innie" hole. Everything was designed so that two pieces of track simply push-fitted together with a satisfying retention-fit thanks to the "jigsaw puzzle" elements.
The plastic part was dark grey, changing to bluegrey in 2003.
Compatibility
Producing identical outlines and with identical metrics to the earlier track (and even using half of the same screwhole positions), upgrading to the modern (9V) metal track still let you run battery-powered 4.5V trains, and (if you added the central power rails) also the earlier 12V trains, all on the same system (although we're not sure how or if a multi-format layout would work with points and crossovers).
The "wibbly-jigsaw" half-plates at the end of each section mean that it's not obviously possible to connect the 1990 metal-clad system to the earlier systems, end-to-end, without resorting to track surgery.
2006: Back to plastic
In 2006 Lego decided that a fully-fledged conductive-track model railway system was just too complicated and expensive, and switched to a fully-plastic version of the 9V system, complete with the same "jigsaw-puzzle" ends. Locos were now powered by battery packs, and remote control was by infra-red controllers.
"L Gauge": Six-stud trains
Normally, unmotorised train wheels are pushed into the ends of a 2×4 axle brick, and for motorisation, into the sides of a four-stud wide motor.
Since train wheels normally don't jut out of the sides of a train, the necessary additional one-stud overhang over each wheel results in a train that is six studs wide.
This results in Lego trains that are a non-standard size, scaled somewhere between OO/HO (four studs wide body) and Gauge 0 (eight studs wide body).
Railway sleepers are 8×2 strips, with a gap in the middle four studs wide, then a stud-width for the clip-on rail, and then a one-stud-wide projection beyond the rail.
Media in category ‘Lego 4.5v - 12V Train System’
The following 17 files are in this category, out of 17 total.
- Battery Case, Lego 101 (LegoAss 1968).jpg 1,498 × 669; 166 KB
- Build a Real Railway, Lego (LPWLego 1971).jpg 2,446 × 2,600; 1.77 MB
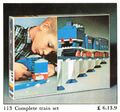
- Complete Train Set, Lego 113 (LegoAss 1968).jpg 1,511 × 1,414; 361 KB
- Electronic control (LegoAss 1968).jpg 1,600 × 1,202; 343 KB
- Full Speed Ahead with Lego 4-5V Train (LPWLego 1971).jpg 2,600 × 1,839; 1.81 MB
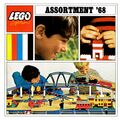
- Lego Assortment 68, catalogue cover (Lego 1968).jpg 1,595 × 1,600; 518 KB
- Lego by Land, Trains (LegoIB1 ~1962).jpg 2,600 × 1,722; 1.27 MB
- Lego by Land, trains (LIB2 1962).jpg 2,600 × 1,688; 1.52 MB
- Lego flexible coupler (Patent CA 702336 A 1965.jpg 2,000 × 1,578; 206 KB
- Lego Train Accessories 150-156 (LegoAss 1968).jpg 3,000 × 1,500; 449 KB
- Lego train tracks (Patent US 3464624 1966).jpg 2,000 × 1,736; 360 KB
- Locomotive with Motor, Lego 112 (LegoAss 1968).jpg 1,496 × 673; 162 KB
- Motor with Three Sets of Wheels, Lego 100 (LegoAss 1968).jpg 1,490 × 678; 177 KB
- Small Train with Motor, Lego 115 (LegoAss 1968).jpg 1,486 × 1,404; 362 KB
- Small Train Without Motor, Lego 111 (LegoAss 1968).jpg 1,502 × 683; 183 KB
- Super Train Set, Lego 119 (LegoAss 1968).jpg 2,992 × 1,540; 903 KB
- Train, boxed (Lego 323-1, 1964).jpg 1,222 × 419; 135 KB


